
Benchmark Sweater Knitalong
Post 9 — 6/28/25
Bonus Blog: Making Other Sleeves

I have more content for you!
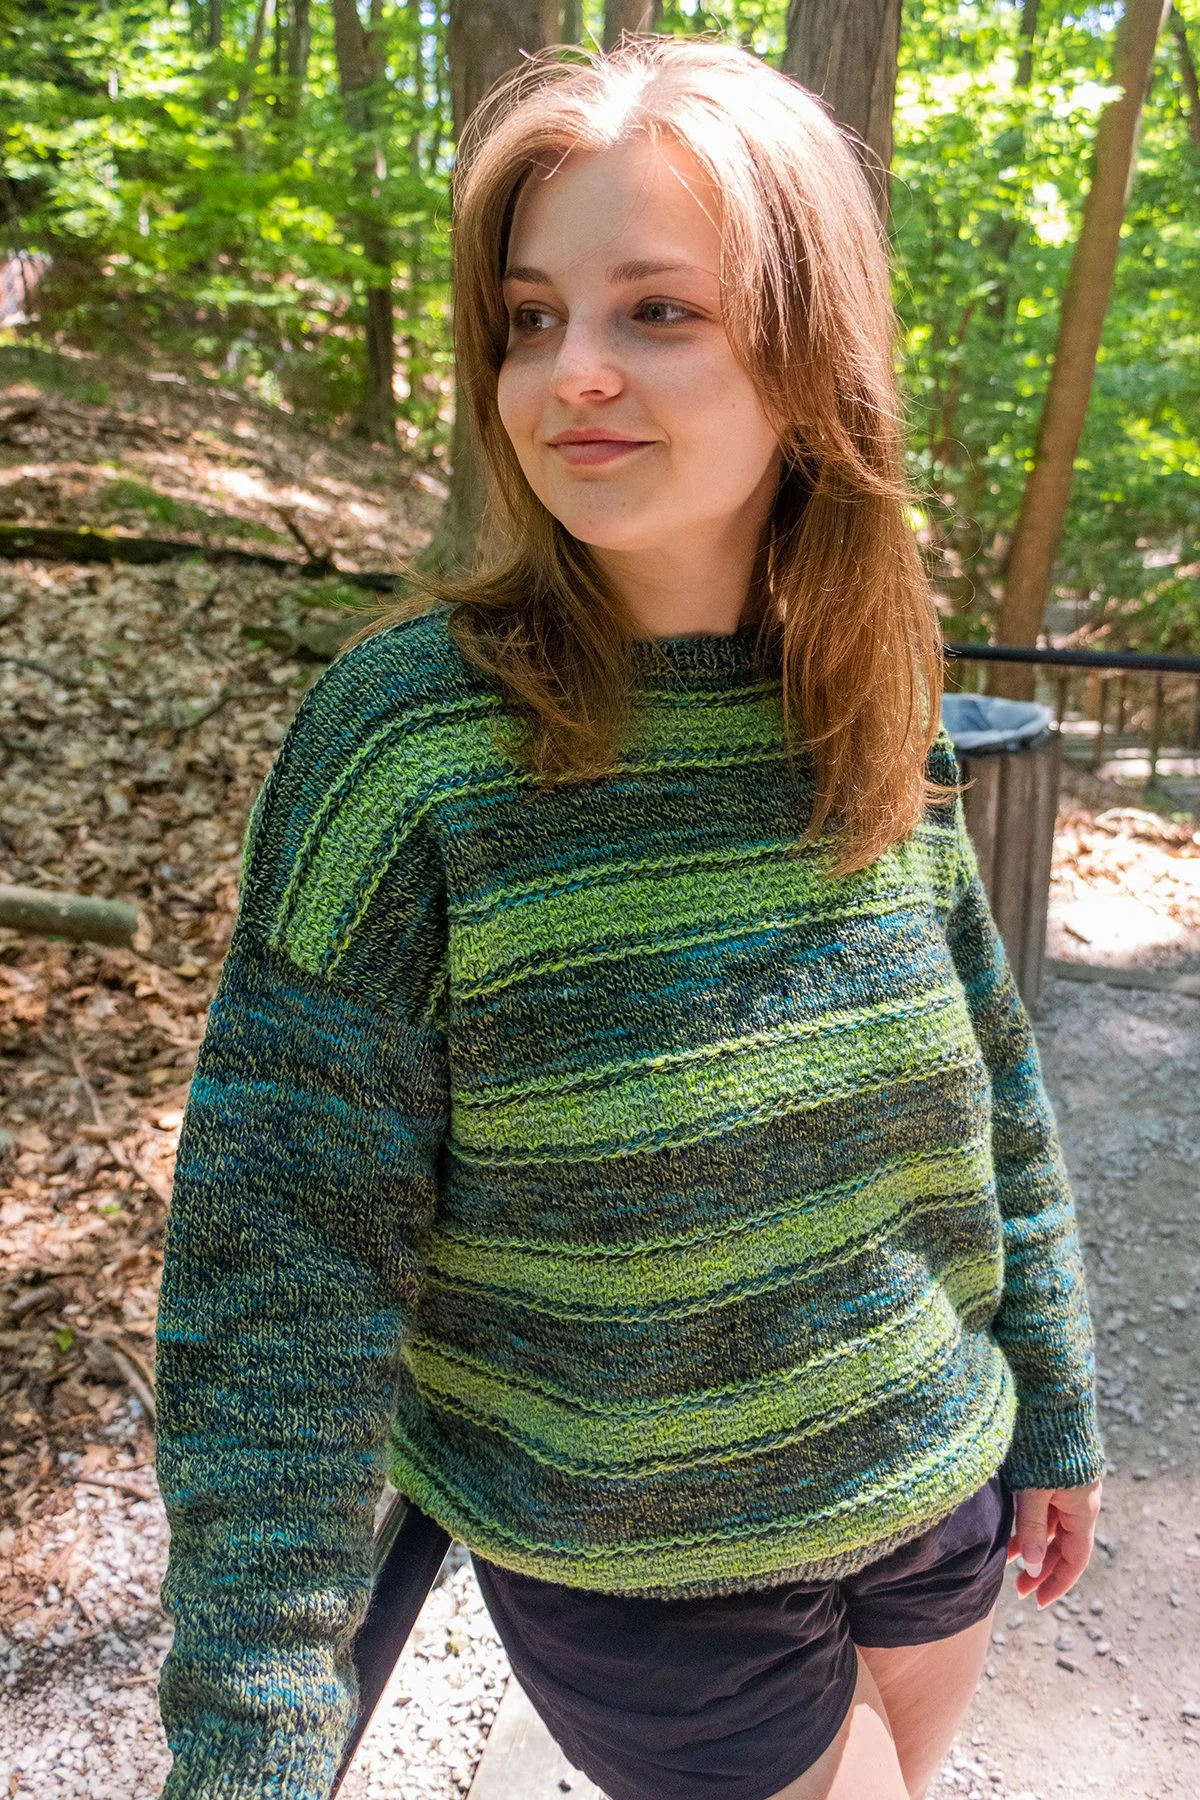
It’s June of 2025, about a year since we concluded the Benchmark KAL. This is Ruth Boelkins, designer of the Benchmark sweater pattern using Plied Yarn North Ave, and like most other projects of mine, I find myself returning again and again to this pullover to make yet another version of it. It’s just so versatile, and easy, and fantastic for stash busting. The process of knitting it is entertaining, even though it’s fairly simple, and fun new color combinations for the alternating textured and stockinette stripes keep presenting themselves!
Perhaps it’s coming from my desire to keep wearing lightweight wool into the spring (and summer in Michigan), that I’m making recent Benchmark pullovers with short sleeves. It’s an option that I want to share with you, if you’re interested in experimenting with the pattern a bit.

Tips for a short sleeve Benchmark sweater:
Follow Sleeve Instructions for your size to pick up stitches around the armhole opening. Then work the first round following the pick up as written (knitting into the back loop of each stitch). Disregard the remainder of the Sleeve Instructions and continue in this way:
Work Decrease Round: K1, k2tog, knit to last 3 stitches, ssk, k1
Knit 2 rounds
Continue making sleeve by working the Decrease Round every 3rd round, for a total of 10 Decrease Rounds (you will have 20 fewer stitches than your picked up number and about 4” of length).
Try on your sweater and check the length and circumference of the sleeve. Do you want it longer and/or smaller? Keep in mind that the ribbing will make the opening slightly smaller and add about 1” of length.
Continue with knit rounds and Decrease rounds as necessary for your desired result.
Change to smaller needle and work 6 rounds of (K1,p1) ribbing.
Bind Off in pattern.

More thoughts on custom sleeves:
You can make the shaping more gradual by spacing out the Decrease Rounds. For example, knit 4 or 5 rounds between each Decrease Round if you want a roomier short sleeve, or you want to work more inches for an elbow or ¾ length sleeve. Experiment with what you prefer, and don’t be afraid to tear back results and try again. You may find a formula that works nicely for you and can be applied to other sweater patterns as well.
For the short sleeved size 44” I made, a single skein of North Ave was sufficient to make the pair of sleeves. I had about ¼ skein leftover. If you’re working with stash and making it scrappy, consider making the sleeves with different colors or finishing them with a contrasting ribbing. Enjoy the creative process! Reach out with any questions or comments to me on Ravelry or spoutknits@gmail.com, and please post your projects on Instagram with @spoutknits to tag me. I love seeing every Benchmark and appreciate being able to share your results!
Post 8 — 3/22/24
It’s a Wrap!

Thank you!
What makes a Knitalong successful? Participation! Our first virtual KAL was so delightful because of the knitters who joined in and showed up for Zoom meetings, sharing the process of making their Benchmark sweaters. Each project was personal. Each knitter was so happy with the kit or color combinations they chose. Everyone was so encouraging in the group, and we had some knitters making their first sweater, first bottom-up sweater, and first sweater with Plied Yarn. Several are already shopping and planning for their next Benchmark sweater in Plied, and that is the biggest compliment toward the yarn and the pattern. I’m thrilled that everyone enjoyed the process, and most of all, are pleased with their results and excited to wear their new Benchmark pullovers!
The Plied Team are still finishing up their Benchmarks, and each one was made with a kit that we put together for the KAL. Kits are still available in the online shop! Ann’s is Bright Scrappy; Beth’s is Red, Black, and White; and Ruth’s are Cool Scrappy and Pink Purple.
For more inspiration, check out the Benchmark pattern page on Ravelry and view all the projects. Several new ones have been added by our KAL knitters. The Plied Instagram feed features several KAL projects, and #benchmarkknitalong is a great place to look too.
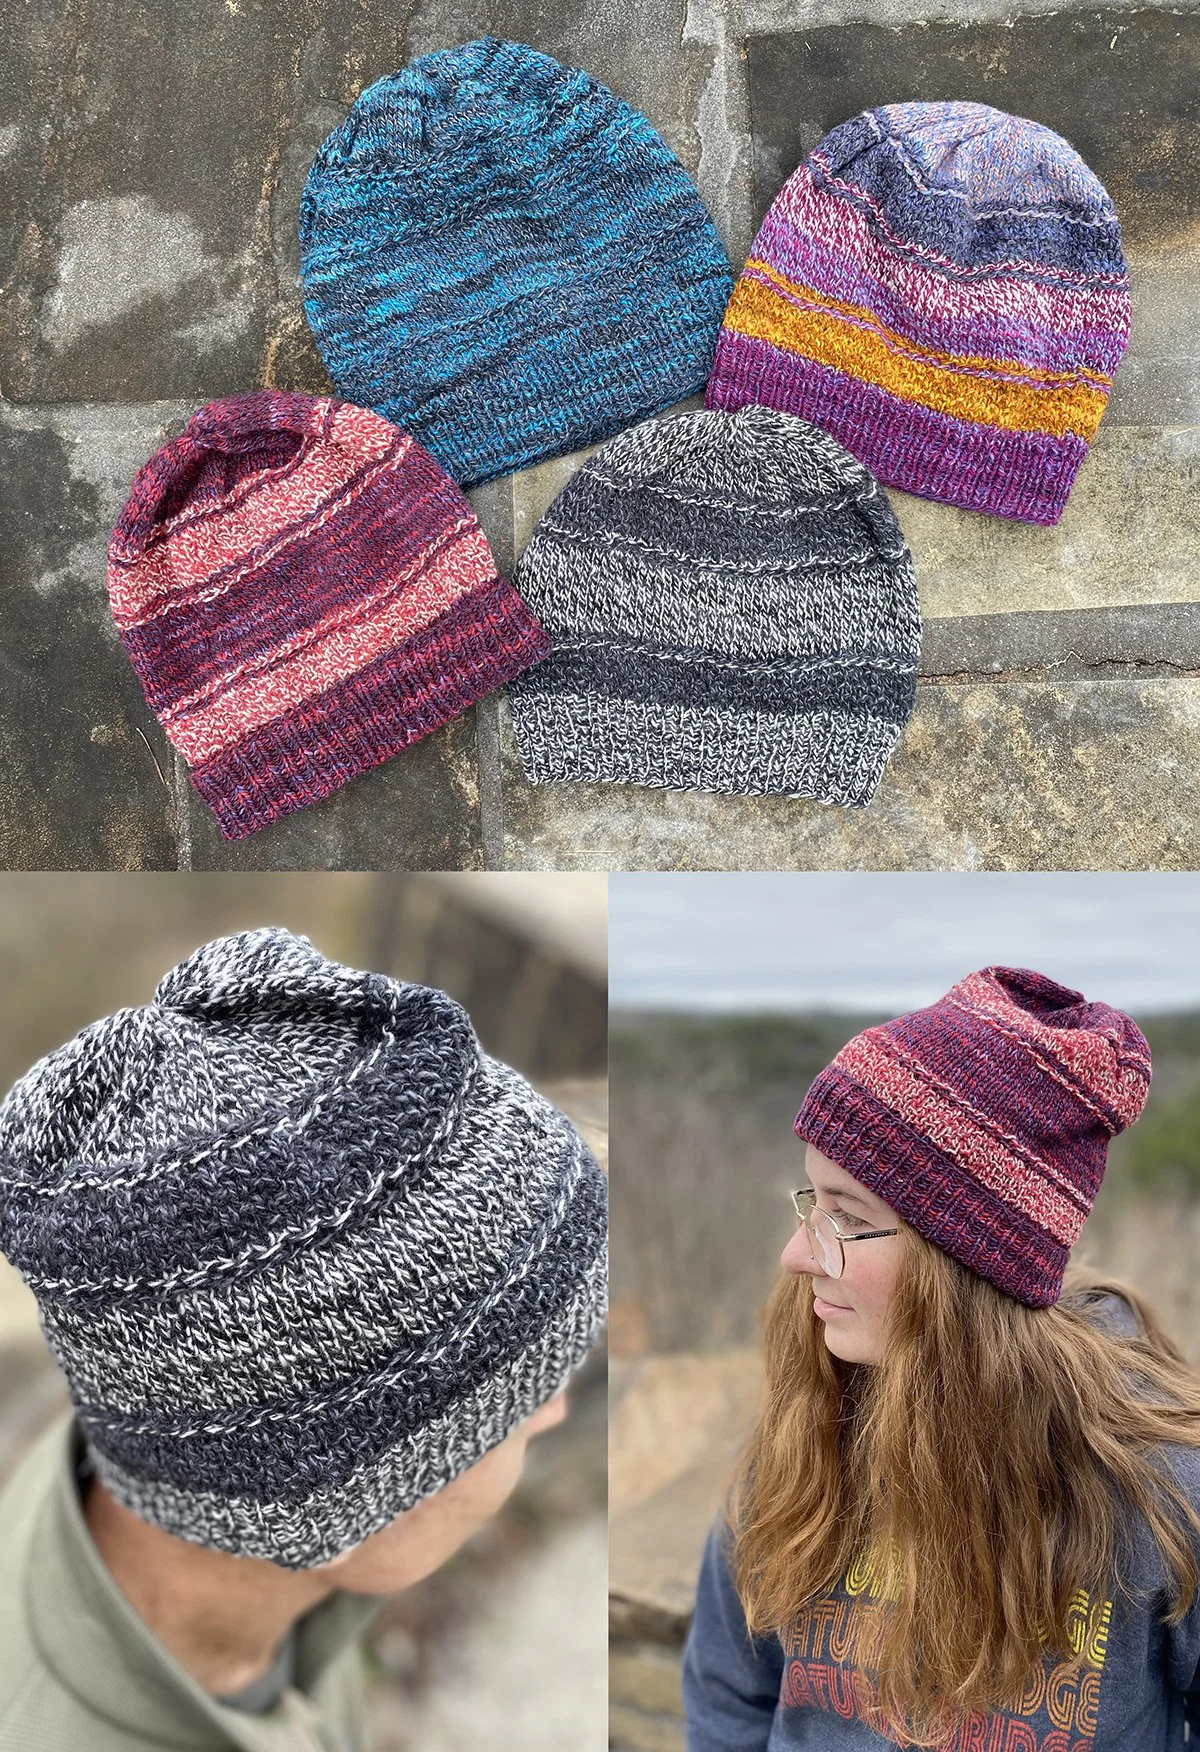
Benchmark Hat
And one more thing: I’ve published a new Benchmark Hat pattern that’s now available on Ravelry! You can use it to stash bust if you have Plied North Ave on hand, or shop a couple of skeins or a set of 6 bobbins to make it. The hat is also a super way to swatch for making a Benchmark sweater. The stitch pattern and gauge are the same, so it’s both a sweet accessory and circular swatch project, all in one!
Post 7 — 3/1/24
Last Stop: Sleeve Island!

You are really near the end!
Have you heard the term “sleeve island”? Many knitters refer to sleeve making as an isolating and indefinite experience, much like hanging out on a deserted island with no clear plan for getting off. Perhaps that’s because knitting sleeves just doesn’t feel as rewarding and exciting as knitting parts of the sweater that seem to show more progress and be more entertaining. But take heart and plunge ahead! All the finishing bits like joining shoulders and making the collar of your Benchmark are complete at this point, so knitting the sleeves means you are really near the end and about ready to wear this pullover. Sleeve Island can be a very happy place!
Tips for knitting these shaped tubes:
Choose whatever method of circular knitting you prefer. Select long needles and do magic loop, 16” and 12” circular needles, or double points. Or use a combination of these and change them up as you decrease and create a smaller circumference. Be sure to use the same size needle throughout, though. Personally, I like to begin with a 16” circular and then transfer to a 12” circular or double points when the stitch count gets too small to comfortably continue on that first needle.

When it comes to knitting ribbing
I prefer to divide the number of stitches in half and put them on two long double points. Then I use a third dpn to work across one set at a time. It’s similar to magic loop, but without the work of pulling the cord around for a bitty tube. Somehow, using wooden double points also helps me to make more snug knit and purl stitches.
And about shaping the sleeves:
You can modify the fit quite easily if you prefer a slimmer sleeve shape than what is written in the pattern. Check the schematic for finished circumferences. I suggest still picking up the given number of stitches around the sleeve opening for your size, but after that, you can decrease at a faster rate and even work more decreases to narrow the sleeve. For example, work the decrease round every 6th round instead of every 7th, and add a couple of decrease rounds to the total. Keep in mind that your total stitch count for the cuff will then be different.
To be wiser than me: Make notes about any mods you do, and remember to consult those notes before beginning the second sleeve. I recently picked up my Benchmark project that had been resting for a few weeks, and forgetting that I made mods to the first sleeve, forged ahead with the second and nearly completed it before noticing that is was turning out a different size. Good thing I don’t mind ripping and re-doing (well, sort of).
Finally, try your Benchmark on before knitting the cuffs! Depending on the ease you chose and your size, the body of the sweater will drop over your shoulder and down your arm at a particular place. Where the sleeve begins on your arm is unique to you, so the suggested length of the sleeve could need to be adjusted. Make it your way, and choose a finished length that makes you happy! The cuffs are about 2” long, so knit more or less length of sleeve to reach whatever point you prefer, pre-cuff. Then make the cuffs, bind off, and know that your Benchmark is just the way you like it!
Questions? Reach out on Instagram @pliedyarnco or write to info@pliedyarns.com.
We’d also love to see your progress! Please tag @pliedyarnco and use #benchmarkknitalong in Instagram posts to share your sweater.
Happy knitting!
Ruth
Post 6 — 2/23/24
Picking Up Stitches
Time to pick up stitches to make a collar
Once you’ve completed the shoulder joins, it’s time to pick up stitches to make a neat collar. I happen to enjoy this process, and I prefer to do it before making sleeves. That’s because trying on the sweater with the collar complete helps you see exactly how the shoulders are fitting and makes choosing sleeve length even more exact. It’s also nice to see the sweater looking almost finished and it gives me the emotional boost I need for pushing through knitting the sleeves!
Tips for picking up stitches:
Give yourself a full selvedge stitch at all times. That means putting your needle tip into the fabric so that there is a complete stitch (pair of legs) to the right of your needle. In other words, don’t put your needle into a place where there’s only a single strand of yarn between your needle and the fabric edge. It’s better to have some selvedge that tucks behind the collar edging and gives reinforcement, and your picked up edge will look so much neater.
You will notice that the decrease stitches shaping the neck have a full stitch between them and the edge of the fabric. That’s where you want to pick up. Put your needle into the space next to the decrease stitch, with a full stitch as selvedge, and you will create a pretty edge for the collar. This also allows the decrease stitches to show for a nice tailored detail!
Picking up stitches for the sleeves
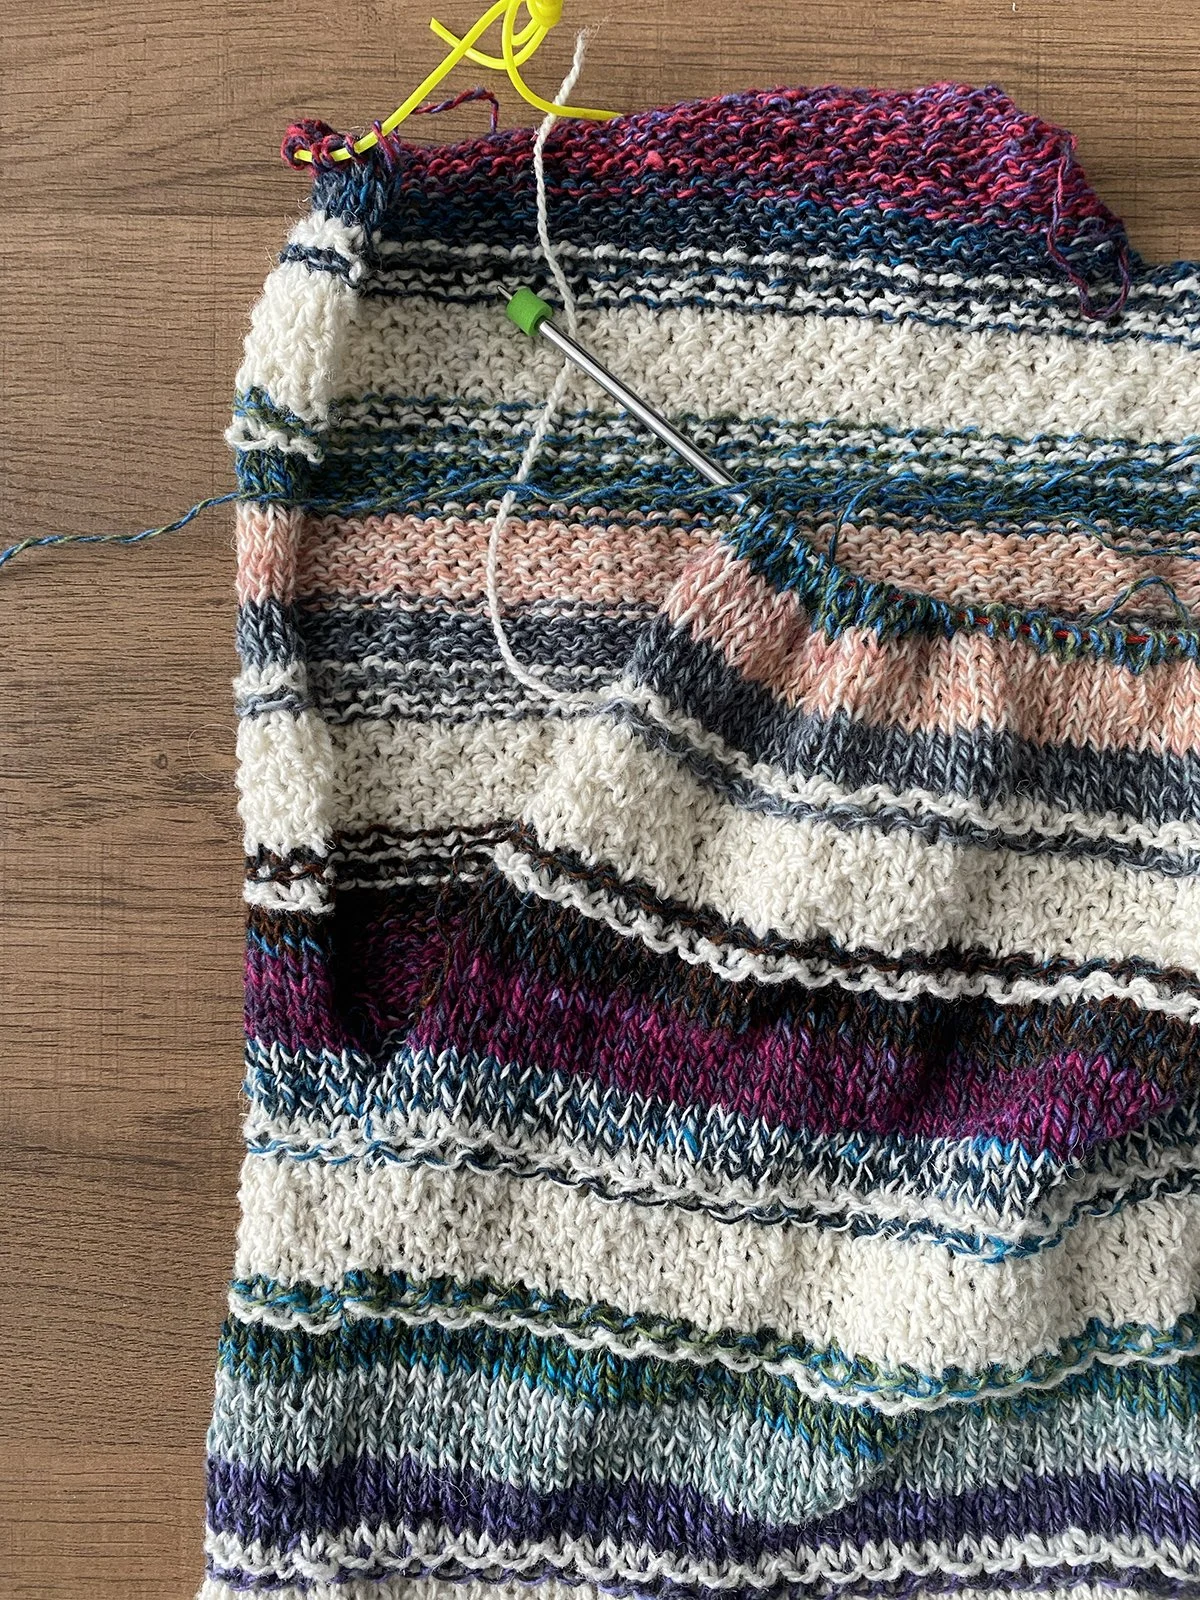
When it comes to picking up stitches for the sleeves, follow the same tip for selvedge. Insert your needle between the edge row of stitches and the next row so that you always have a full stitch (pair of legs) to the right of your needle. Try to pick up in a tidy row along the stockinette stripes in particular so that you see a continuous line of full stitches along your pick up edge. In the seed stitch stripes and over the shoulder join, just do the best you can to continue that line. As you pick up stitches in a 3 out of 4 ratio, use your best judgement for where to insert your needle in purl and knit stitches. Keep counting and aim for half the necessary picked up number when you reach the shoulder. I avoid the Bind Off and pick up stitches on either side of it.
When you get to the end of round, if your picked up number is off by a few, adjust the count on your first round of knitting. Decrease or increase as necessary on either side of your marker. That’s an acceptable quick stitch count fix, and you’ll never notice it at the underarm. And don’t forget to work the stitches through the back leg on that first knit round as the pattern says! That tidies up the tension and snugs up your join.
A word of encouragement: Even though I have lots of practice picking up stitches for sweaters, I still often make mistakes and tear them out for another try. Maybe it’s because I get more particular and prefer spending a little more time redoing the edge before moving on. More than once, I’ve torn off a finished collar after trying it on and not being happy with how it looks. If things don’t look as nice as you’d like, I encourage you to try again. That’s the beauty of the knitting process—it’s so easy to undo and redo something. After all, why not get some extra practice at a technique you don’t do very often? And the reward will be a sweater that looks terrific.
Questions? Reach out on Instagram @pliedyarnco or write to info@pliedyarns.com.
We’d also love to see your progress! Please tag @pliedyarnco and use #benchmarkknitalong in Instagram posts to share your sweater.
Happy knitting!
Ruth
Post 5 — 2/16/24
Holding Live Stitches & Joining Shoulders

A Few Suggestions for Holding Live Stitches
While making a bottom up sweater, I always feel so accomplished when arriving at the underarms and beginning the upper body portions. Benchmark is knit back and forth in separate pieces at this point, so it’s time to enjoy shorter rows and see the entire front and back of your sweater take shape.
At the underarm you will be directed to hold half of the live stitches for working on later. Here are a few suggestions for doing so: Use nice smooth sock yarn threaded onto a needle, or try my favorite new method of using stitch saver tubes. You can find them at local yarn shops or online at our wonderful stockist String Theory Yarn Company.
The tubes are awesome for sticking directly onto the tip of your knitting needle and then carefully drawing the tube through the stitches! Trim the tube to desired length and tie the ends together. When it’s time to use those stitches again, simply untie the tube, push an end back on to your knitting needle, and pull the needle through the stitches. It’s delightfully simple and stitches slide easily on and off the tube. Do the same with sets of shoulder stitches. Of course, smooth sock yarn is handy for holding stitches, too. You just have the added step of threading a needle and transferring those stitches one at a time.

3-Needle Bind Off
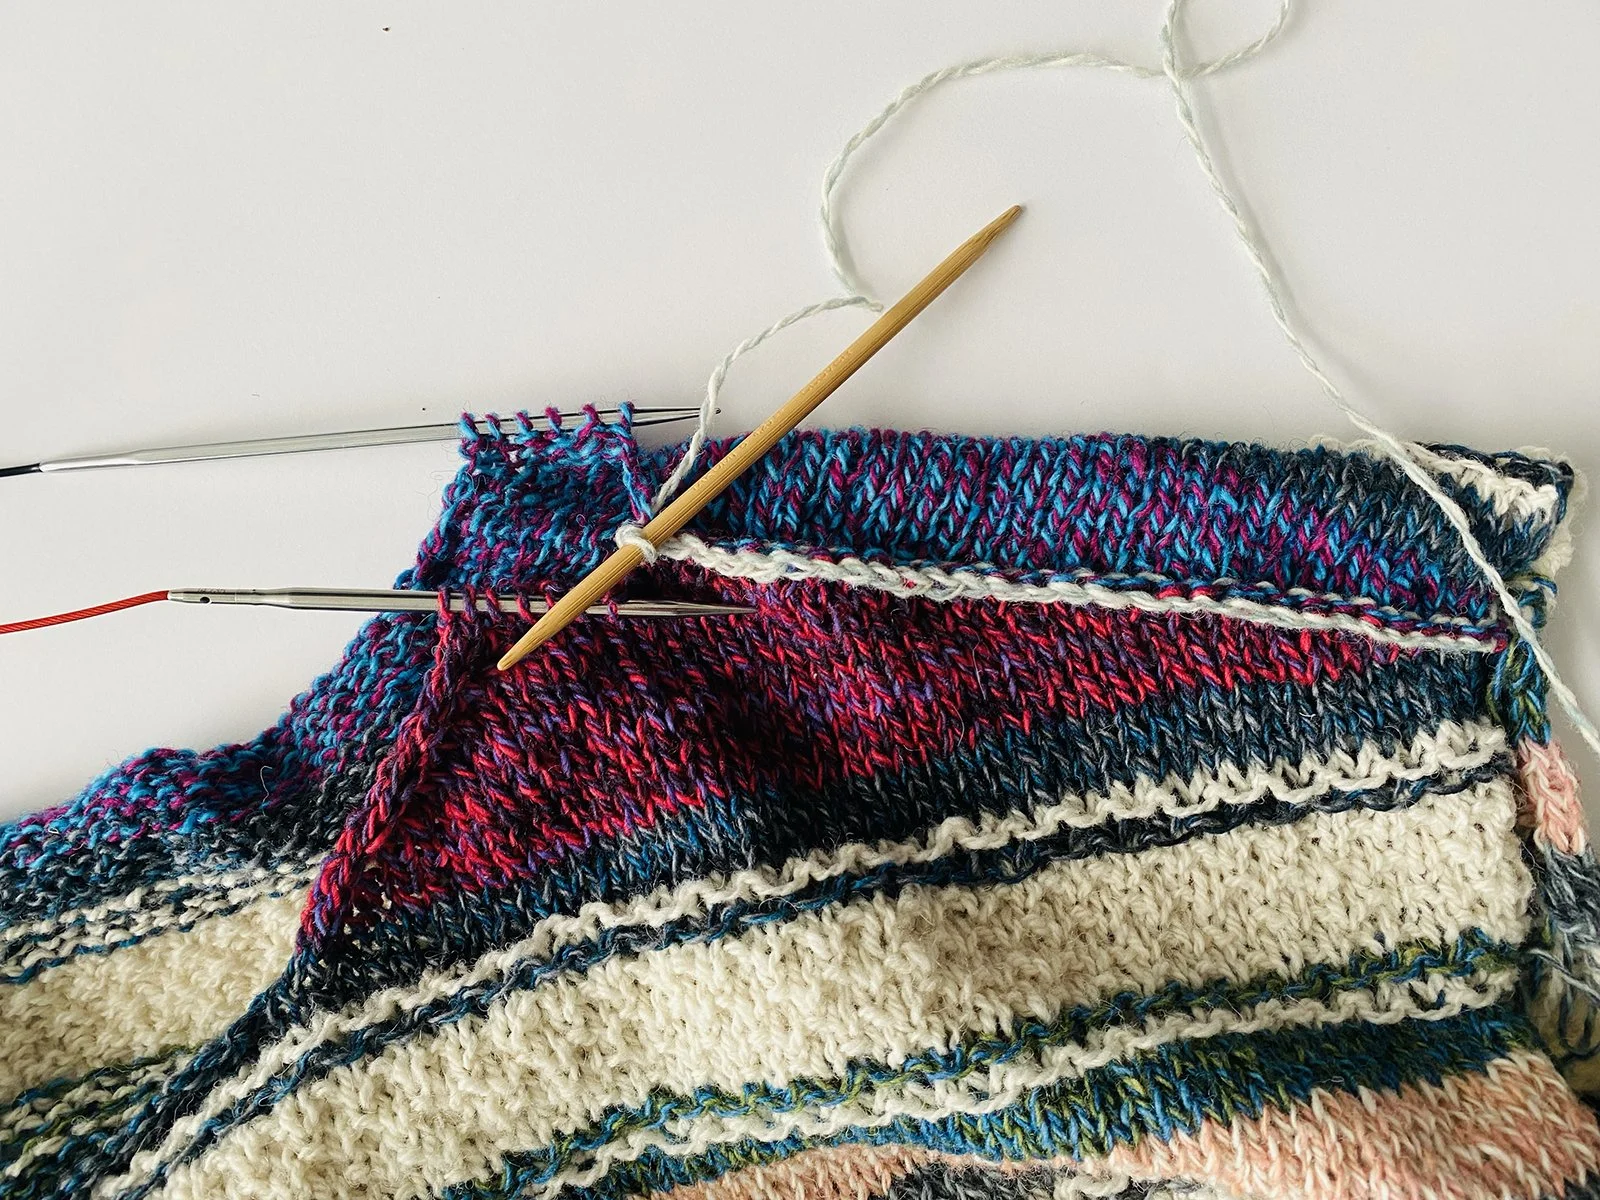
When it comes to joining the shoulder pieces with 3-Needle Bind Off, I prefer to use a double-pointed needle for my third needle. You can see in the photos that this DPN is used in my right hand for working the bind off, while the sets of live stitches are held on two other needles. It’s less cumbersome than using another circular needle tip or straight needle. I like that the needle doing the work is short and light.
Have you noticed that the bind off is done in different directions for the Left and Right Shoulders? That’s because I prefer to see the new row of stitches (made as you work the bind off) on the front side of the sweater. It’s a small detail that mainly shows up if you’re making it scrappy and using a contrast color for the join, but it also looks extra nice when working the bind off with a color that matches the shoulder pieces.
Questions? Reach out on Instagram @pliedyarnco or write to info@pliedyarns.com.
We’d also love to see your progress! Please tag @pliedyarnco and use #benchmarkknitalong in Instagram posts to share your sweater.
Happy knitting!
Ruth
Post 4 — 2/9/24
Sweater Body Tips
Congratulations on having your Benchmark Sweater underway!
By now you have probably cast on, accomplished the ribbing rounds, and are working your way through the Stitch Pattern in the Round.
Have you checked gauge again? It’s a great idea to give it a look, anytime you are making a sweater. Select a portion of the stockinette fabric and count your stitches within 4”. If you aren’t achieving 20 stitches, change up your needle to tighten or loosen your gauge. There’s usually no need to begin again. The bottom of your sweater is not the most important place for your sweater to match the finished measurement. The bust area is more likely to matter to you, so adjusting gauge now is ideal! Blocking will even out any small fabric changes.
How are your color changes going? Having the beginning of round placed under the arm is forgiving, so don’t stress about a few wonky stitches. Things that seem obvious now as you stare at your knitting will be unnoticeable when you’re wearing the sweater. Plied Yarn will bloom when blocked, and using tails to snug up gaps and tidy things is a good trick for hiding imperfections too.
To Carry or Not to Carry
Carrying or breaking your yarns at color changes is an individual choice. What do you prefer? Personally, I carry through short stripe sections and break yarn for anything more than a few rounds. I just can’t be bothered to have more than one strand attached if it’s not necessary, and I really enjoy the process of weaving in ends. It’s almost a meditative activity for me, at the completion of a project.
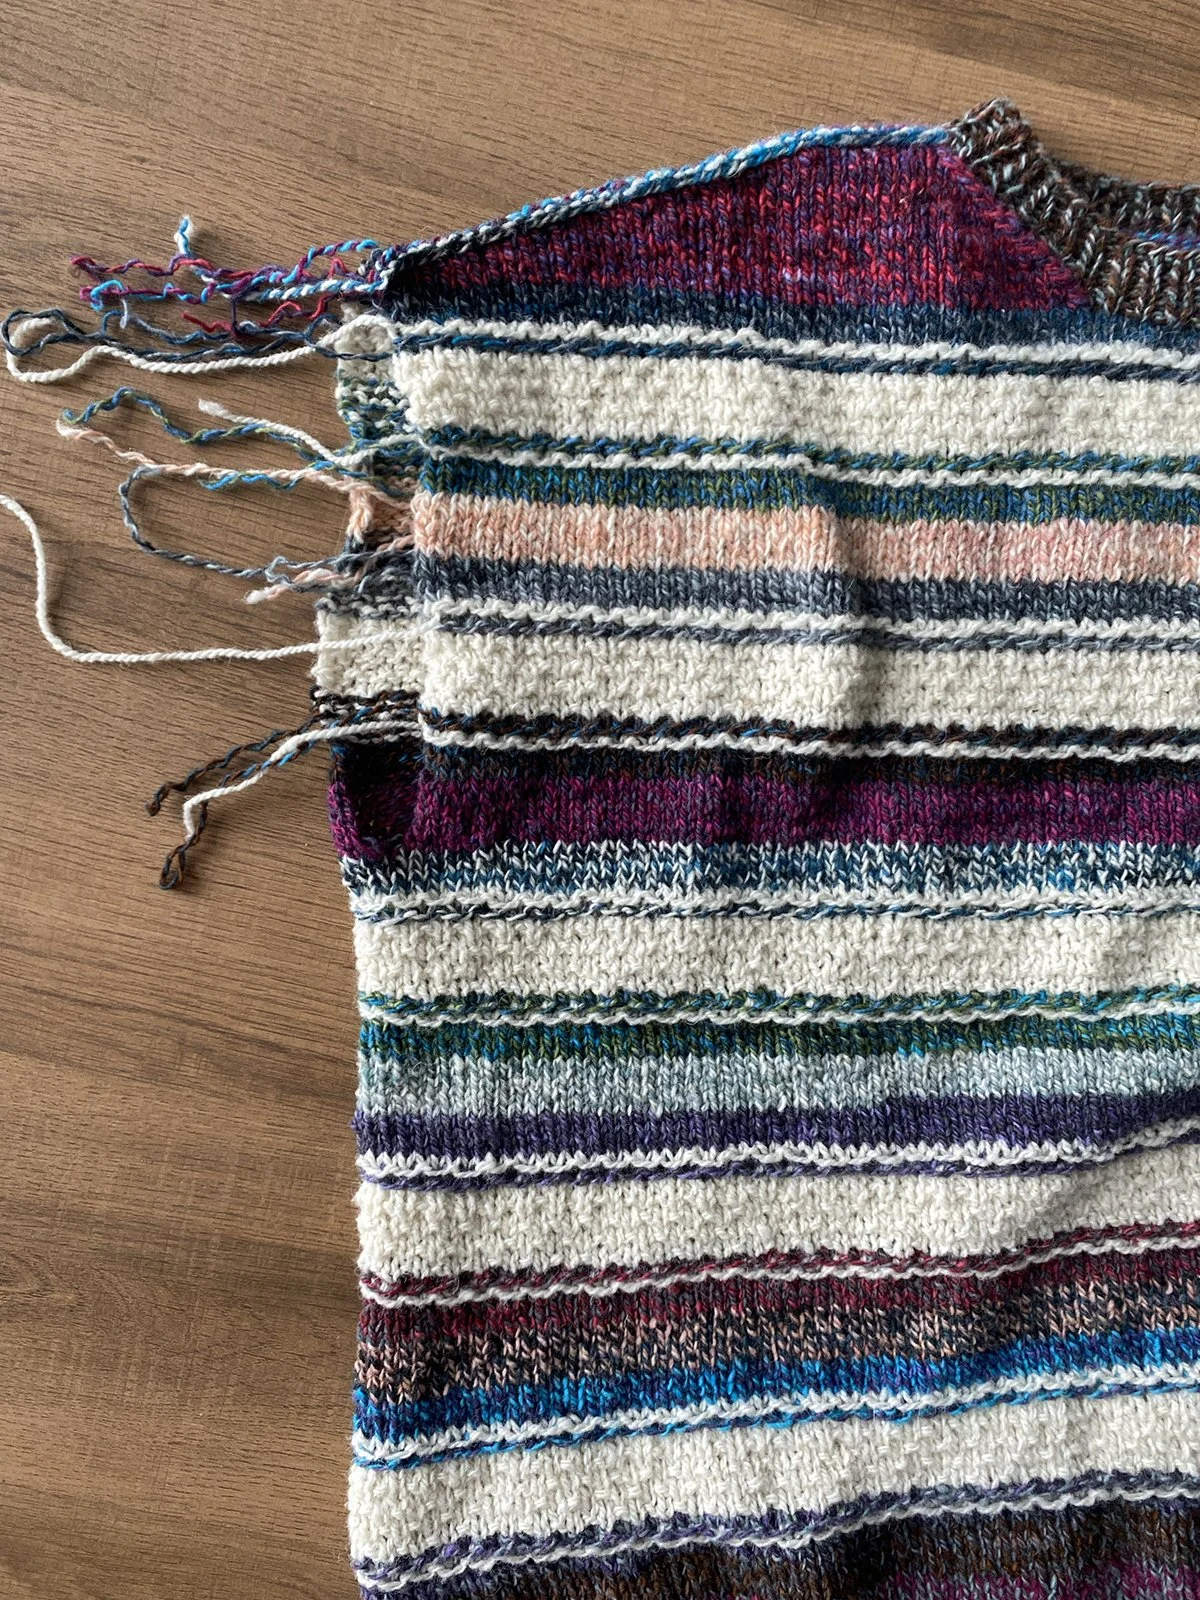
Speaking of which—save the weaving in of ends for the very end! This mostly pertains to the upper front and back portions that you will be knitting back and forth, where yarn tails will hang at the edge of your work. Picking up stitches around the neckline and sleeve openings will go much smoother without the extra bulk of yarn tails that have been added to the fabric. Tolerate the unfinished “mess” and let the tails hang free.
Questions or comments? I love hearing from you via Ravelry messages, Instagram posts @pliedyarnco and emails to info@pliedyarns—and thanks so much for adding your projects to Ravelry and linking them to the Benchmark pattern page. It’s so fun to see them taking shape!
Post 3 — 2/2/24
How to Make a Scrappy Benchmark

Get your Main Color yardage organized!
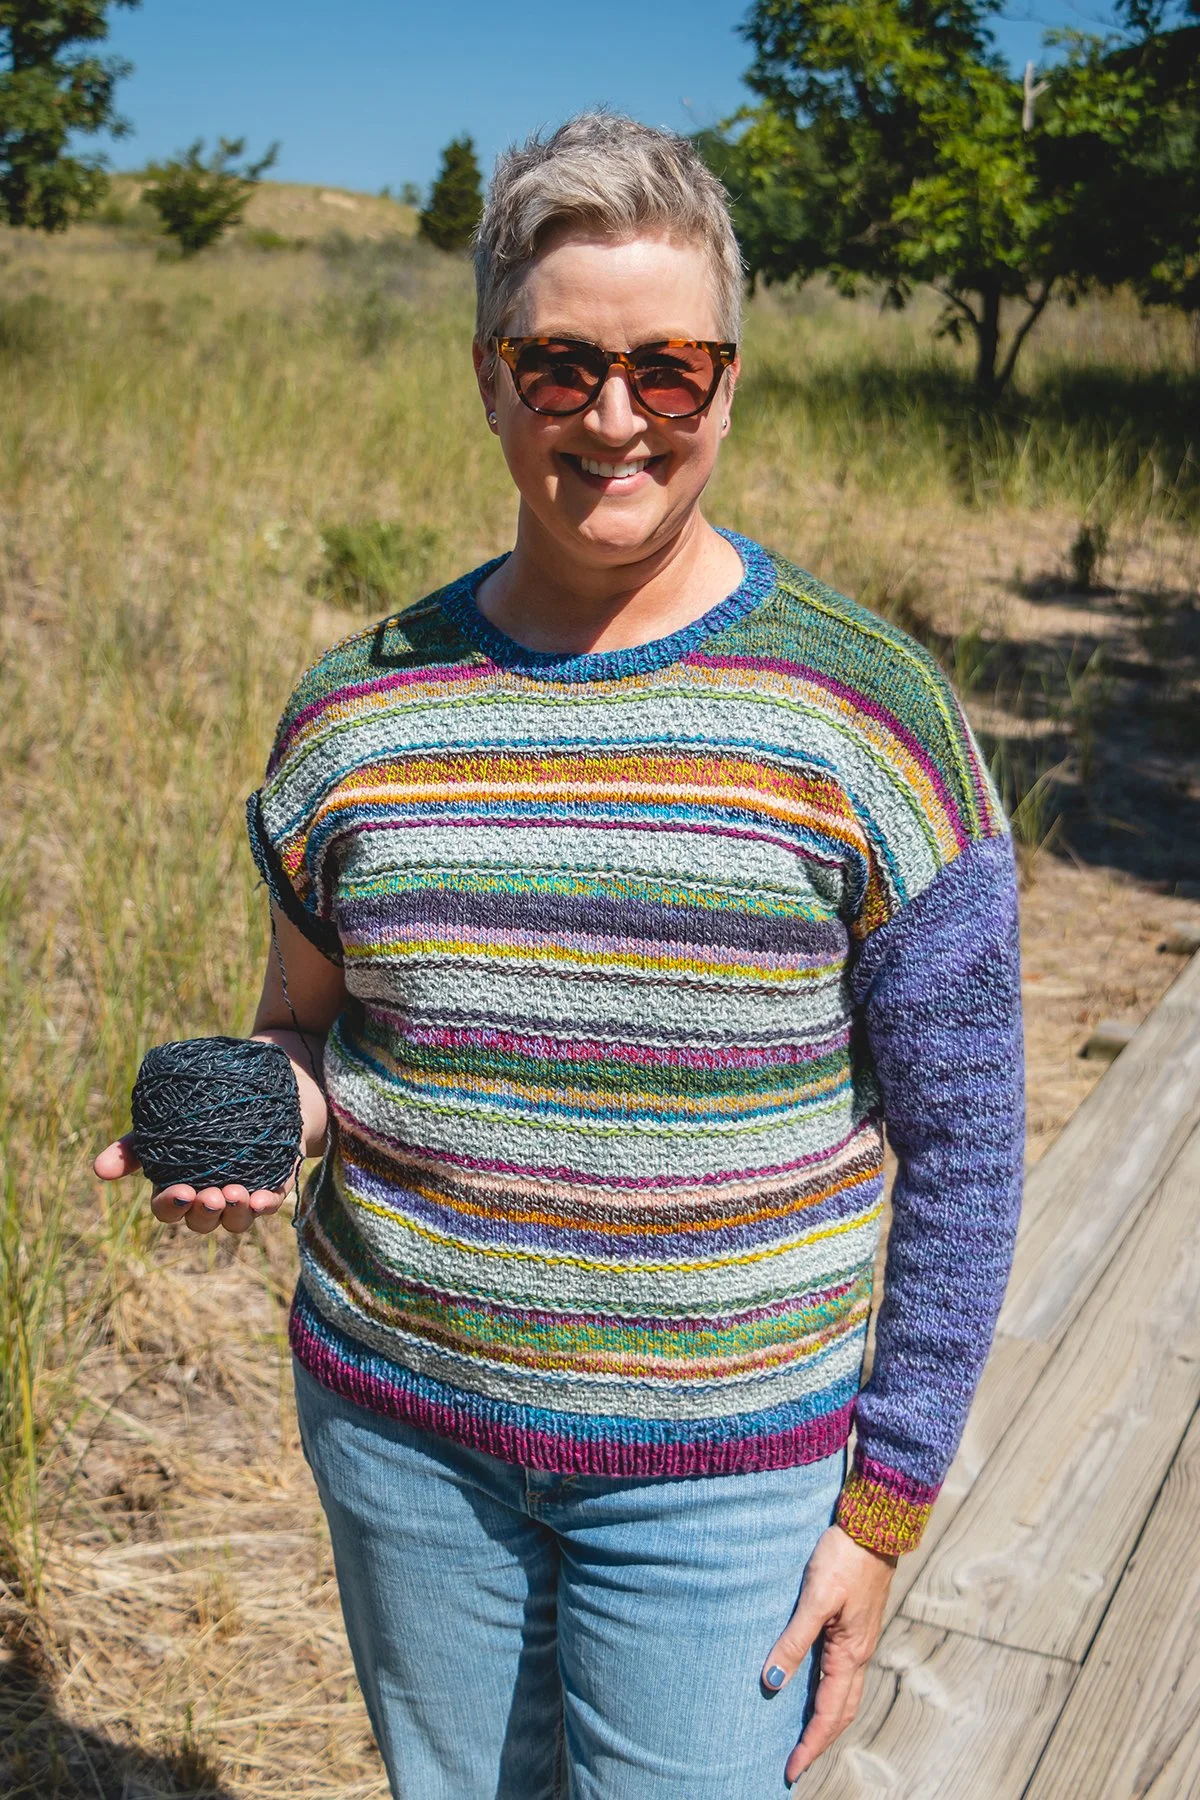
It might appear complex, but making a multi-colored Benchmark sweater is actually easy to do. The key is getting your Main Color yardage organized. That’s where all the different colors are combined and used together for the Body and Sleeves.
In the Body portion, MC is used a few times within the repeated 30 row Stitch Pattern: in a couple of 2-row honeycomb mosaic stripes, and in 14 rows of stockinette. Simply fill those MC rows with your scrappy colors! For the Sleeves, use full skeins, either the same or different.
The Contrast Color is used exactly as written in the pattern, in the Body only: as 2-row honeycomb mosaic stripes and an 8-row broken seed stitch section within the repeated 30-row Stitch Pattern.
Decide on your Scrap Yarn option. Purchase enough Plied Yarn North Ave bobbins or scrap packs to equal about ⅔ of the Main Color yardage and full skeins to equal ⅓. That should cover the Main Color of the body (bobbins) and also the sleeves (skeins). Or, gather up any North Ave remnants and random skeins in your stash, and put them together to equal the total MC yardage.

How will you use the Scrap Yarn colors?
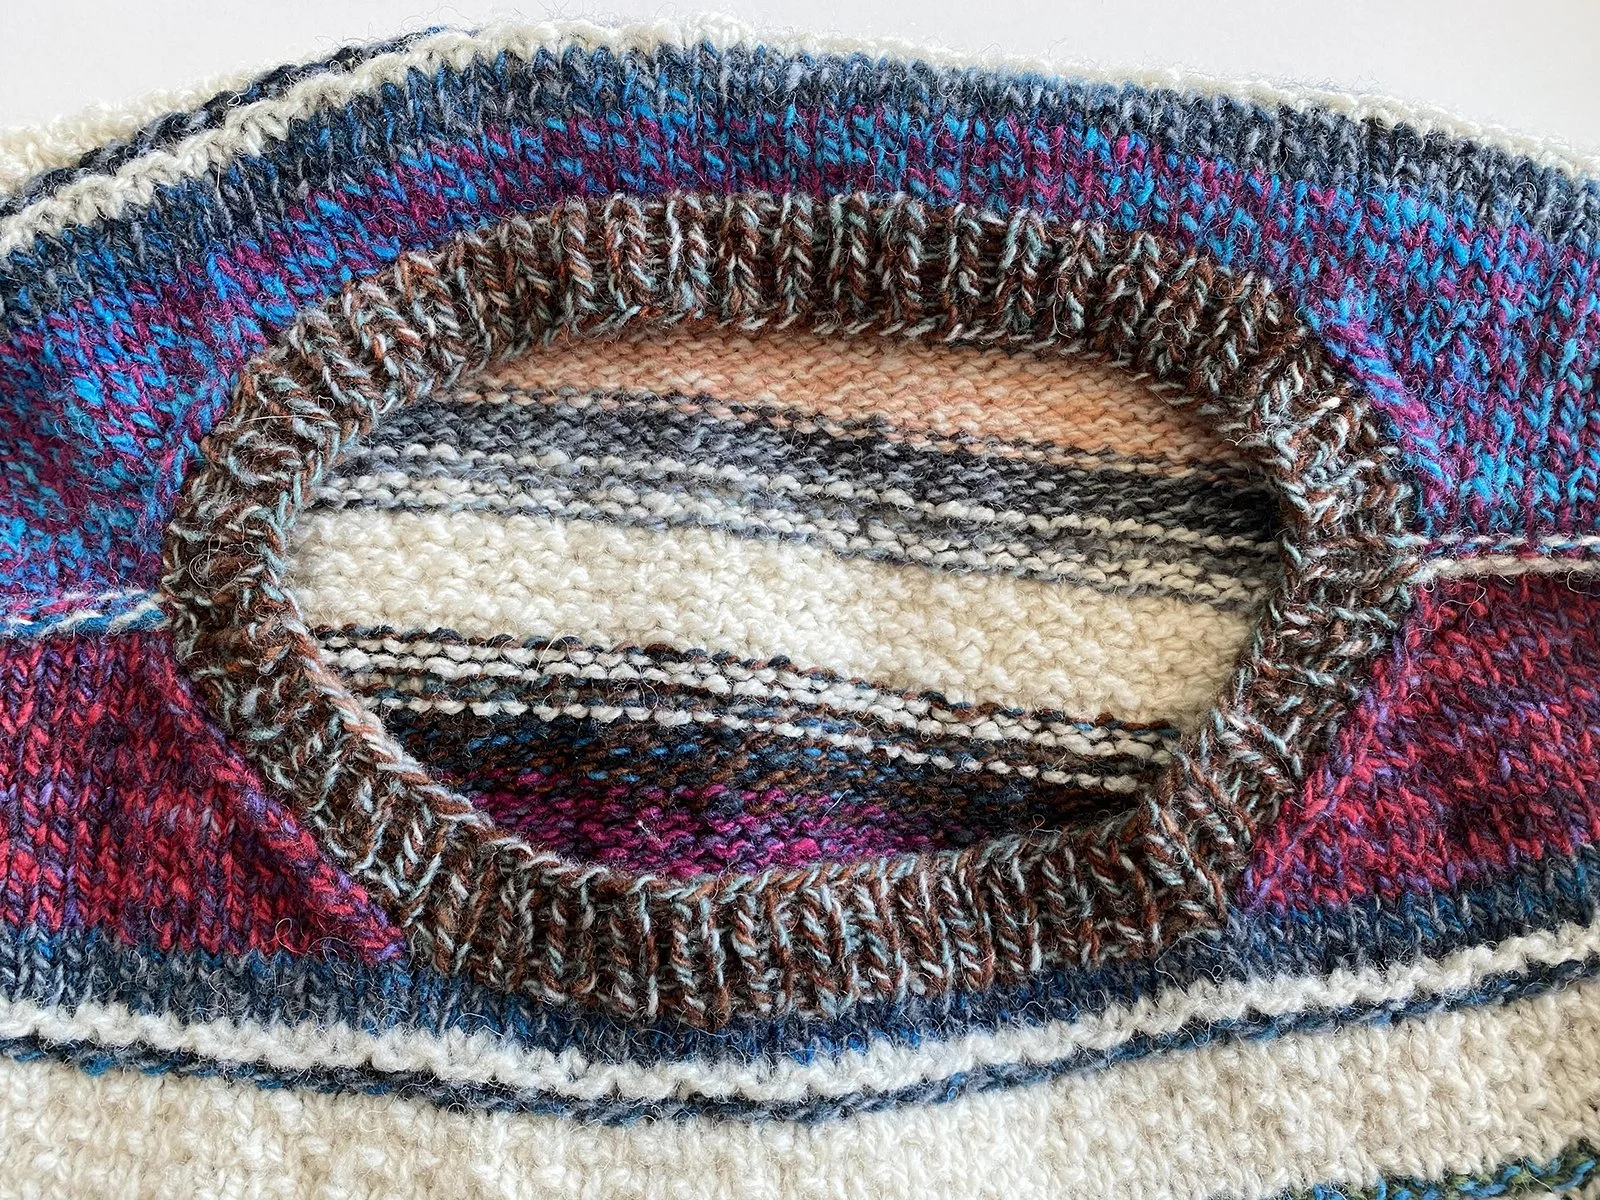
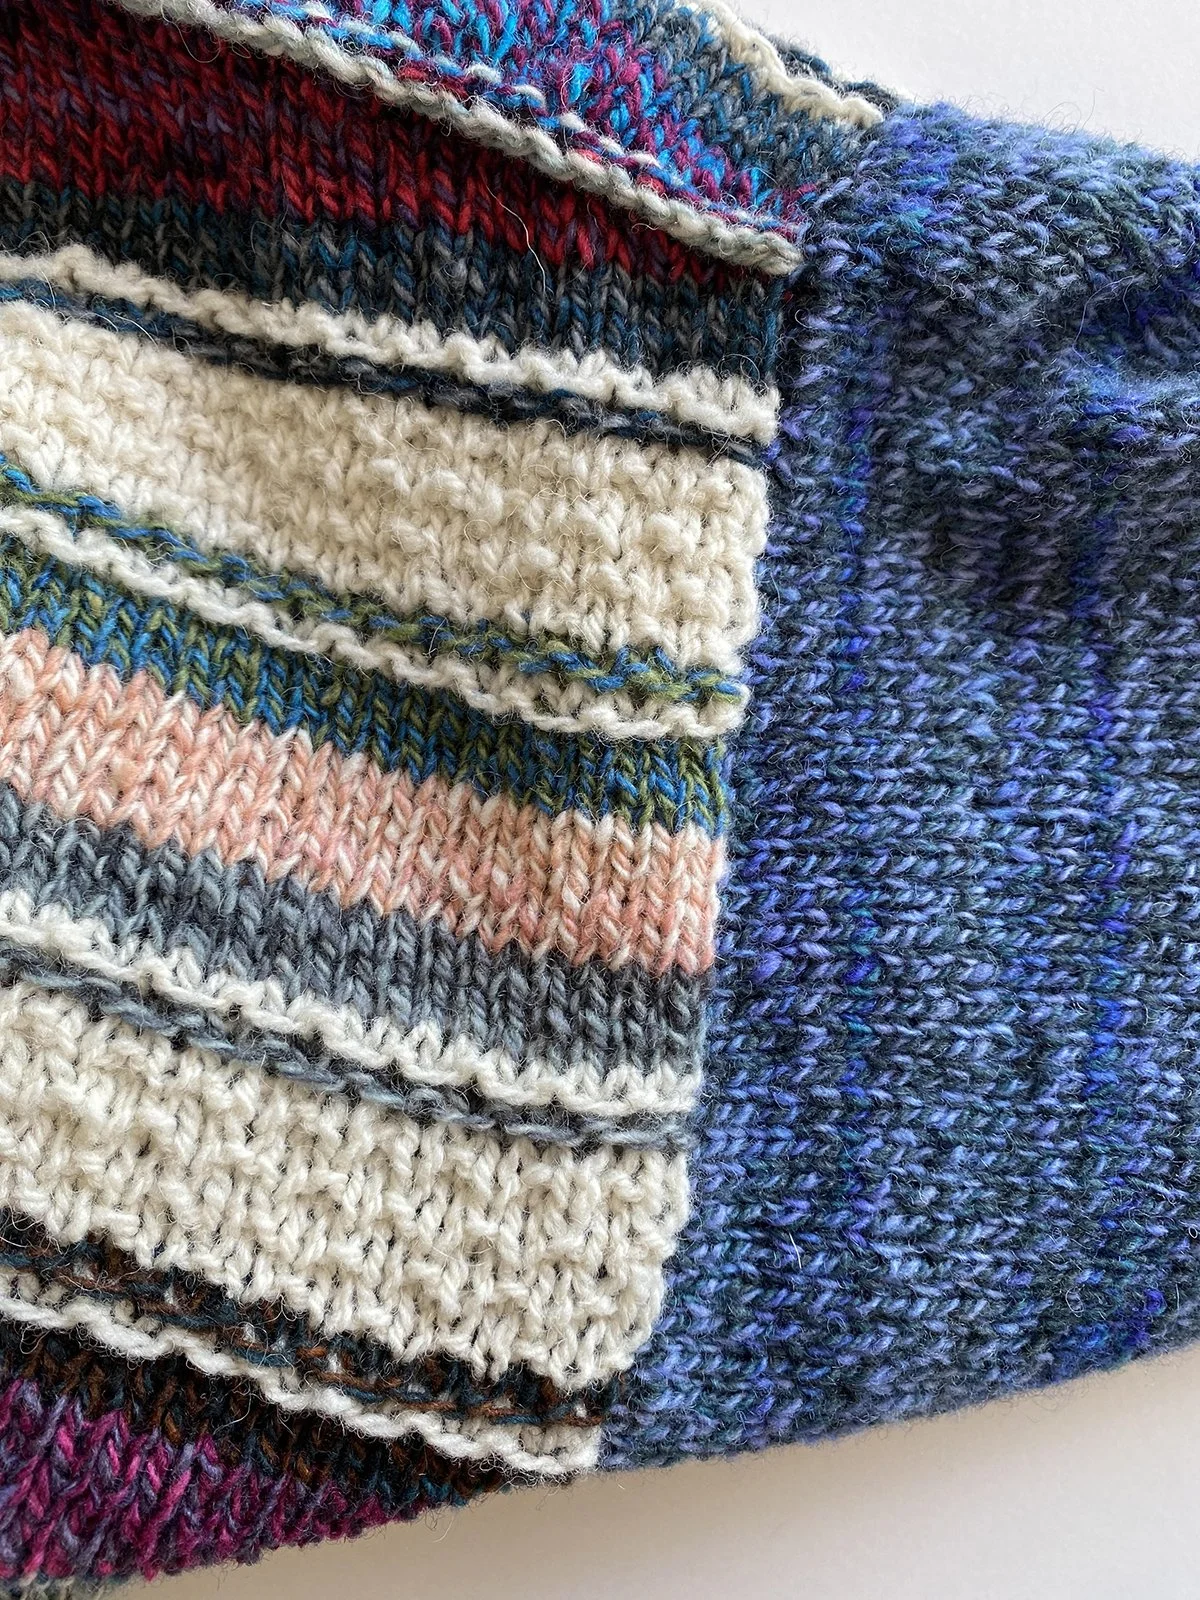
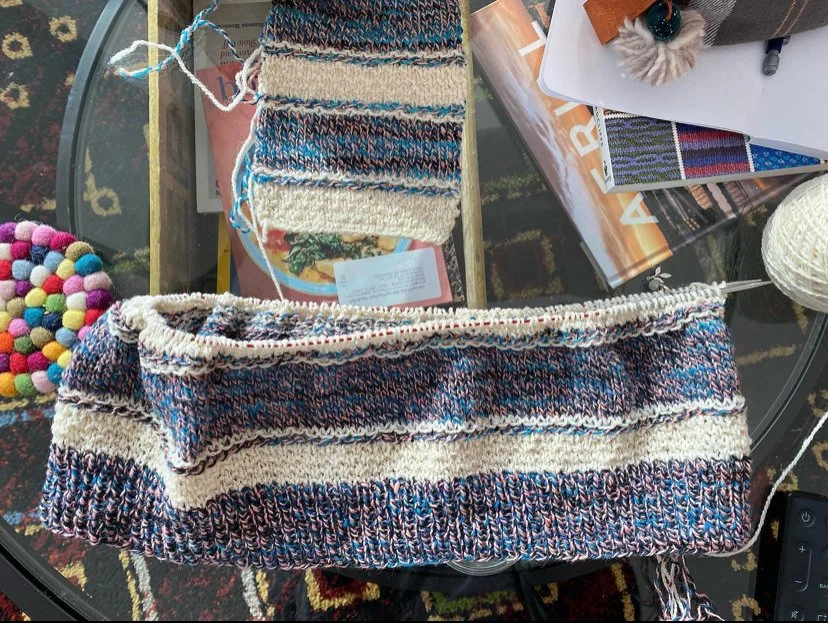
I recently made one Scrappy Benchmark with bobbins, using up one complete bobbin at a time and just going from one to the next in the order of my choice. Alternatively, you can use any amount of a bobbin and make random widths of stripes with them. That way you can vary the amount of each color used at a time and even repeat colors in different places of the body. I used full skeins of the same color for the sleeves.
I made my original Scrappy Benchmark using all remnants in my stash for the Body MC and different full skeins for each sleeve. I put all the colors I wanted to use into a bowl on my coffee table and just selected my next color randomly, all throughout the Body. Sometimes I made 2 rows of a color, or 3, or 4, or 5. I generally filled the 16 rows of stockinette with 3 or 4 colors this way, and I used a different color for each MC 2 row mosaic stripe.
Tips for the upper Body and Yoke
Because you divide for Front and Back at the underarms, you will need to decide if the color pattern of these halves will match. I set aside enough of each color I used for the Front so that I could copy the stripe pattern when making the Back. For the version I made when using up entire bobbins at a time, that meant using about half the bobbin (I could see that I was getting about 6 rows per bobbin when working in the round for the Body, so I did 6 rows for the Front at this point, and then set that bobbin aside for the Back).
Also, when you get to the very top of the Front and Back, you will work sections of short rows to shape the Neck and Shoulders. Work each of these sections with a single color. You can make the Right & Left Front and Right & Left Back shoulder pieces match each other, or not. But when working each of these sections, if you change colors after beginning the short rows, your new color won’t look like a complete stripe because it won’t reach to the edge of the piece.
The detail of the 3-needle bind off used to join the shoulders is particularly noticeable if you use a contrasting color. Your choice! Make it stand out, or let it blend in. Neck ribbing is also a fun place to add some contrast and use a scrappy color, as are the sleeve cuffs.
Remember to have fun, and that there’s no right or wrong way to combine your colors. Just YOUR way!
Reach out for help and share any comments, too—message me on Instagram or leave a comment on any @pliedyarnco post about the KAL.
Post 2 — 1/26/24
Swatching and Casting On
“Swatch me now!”
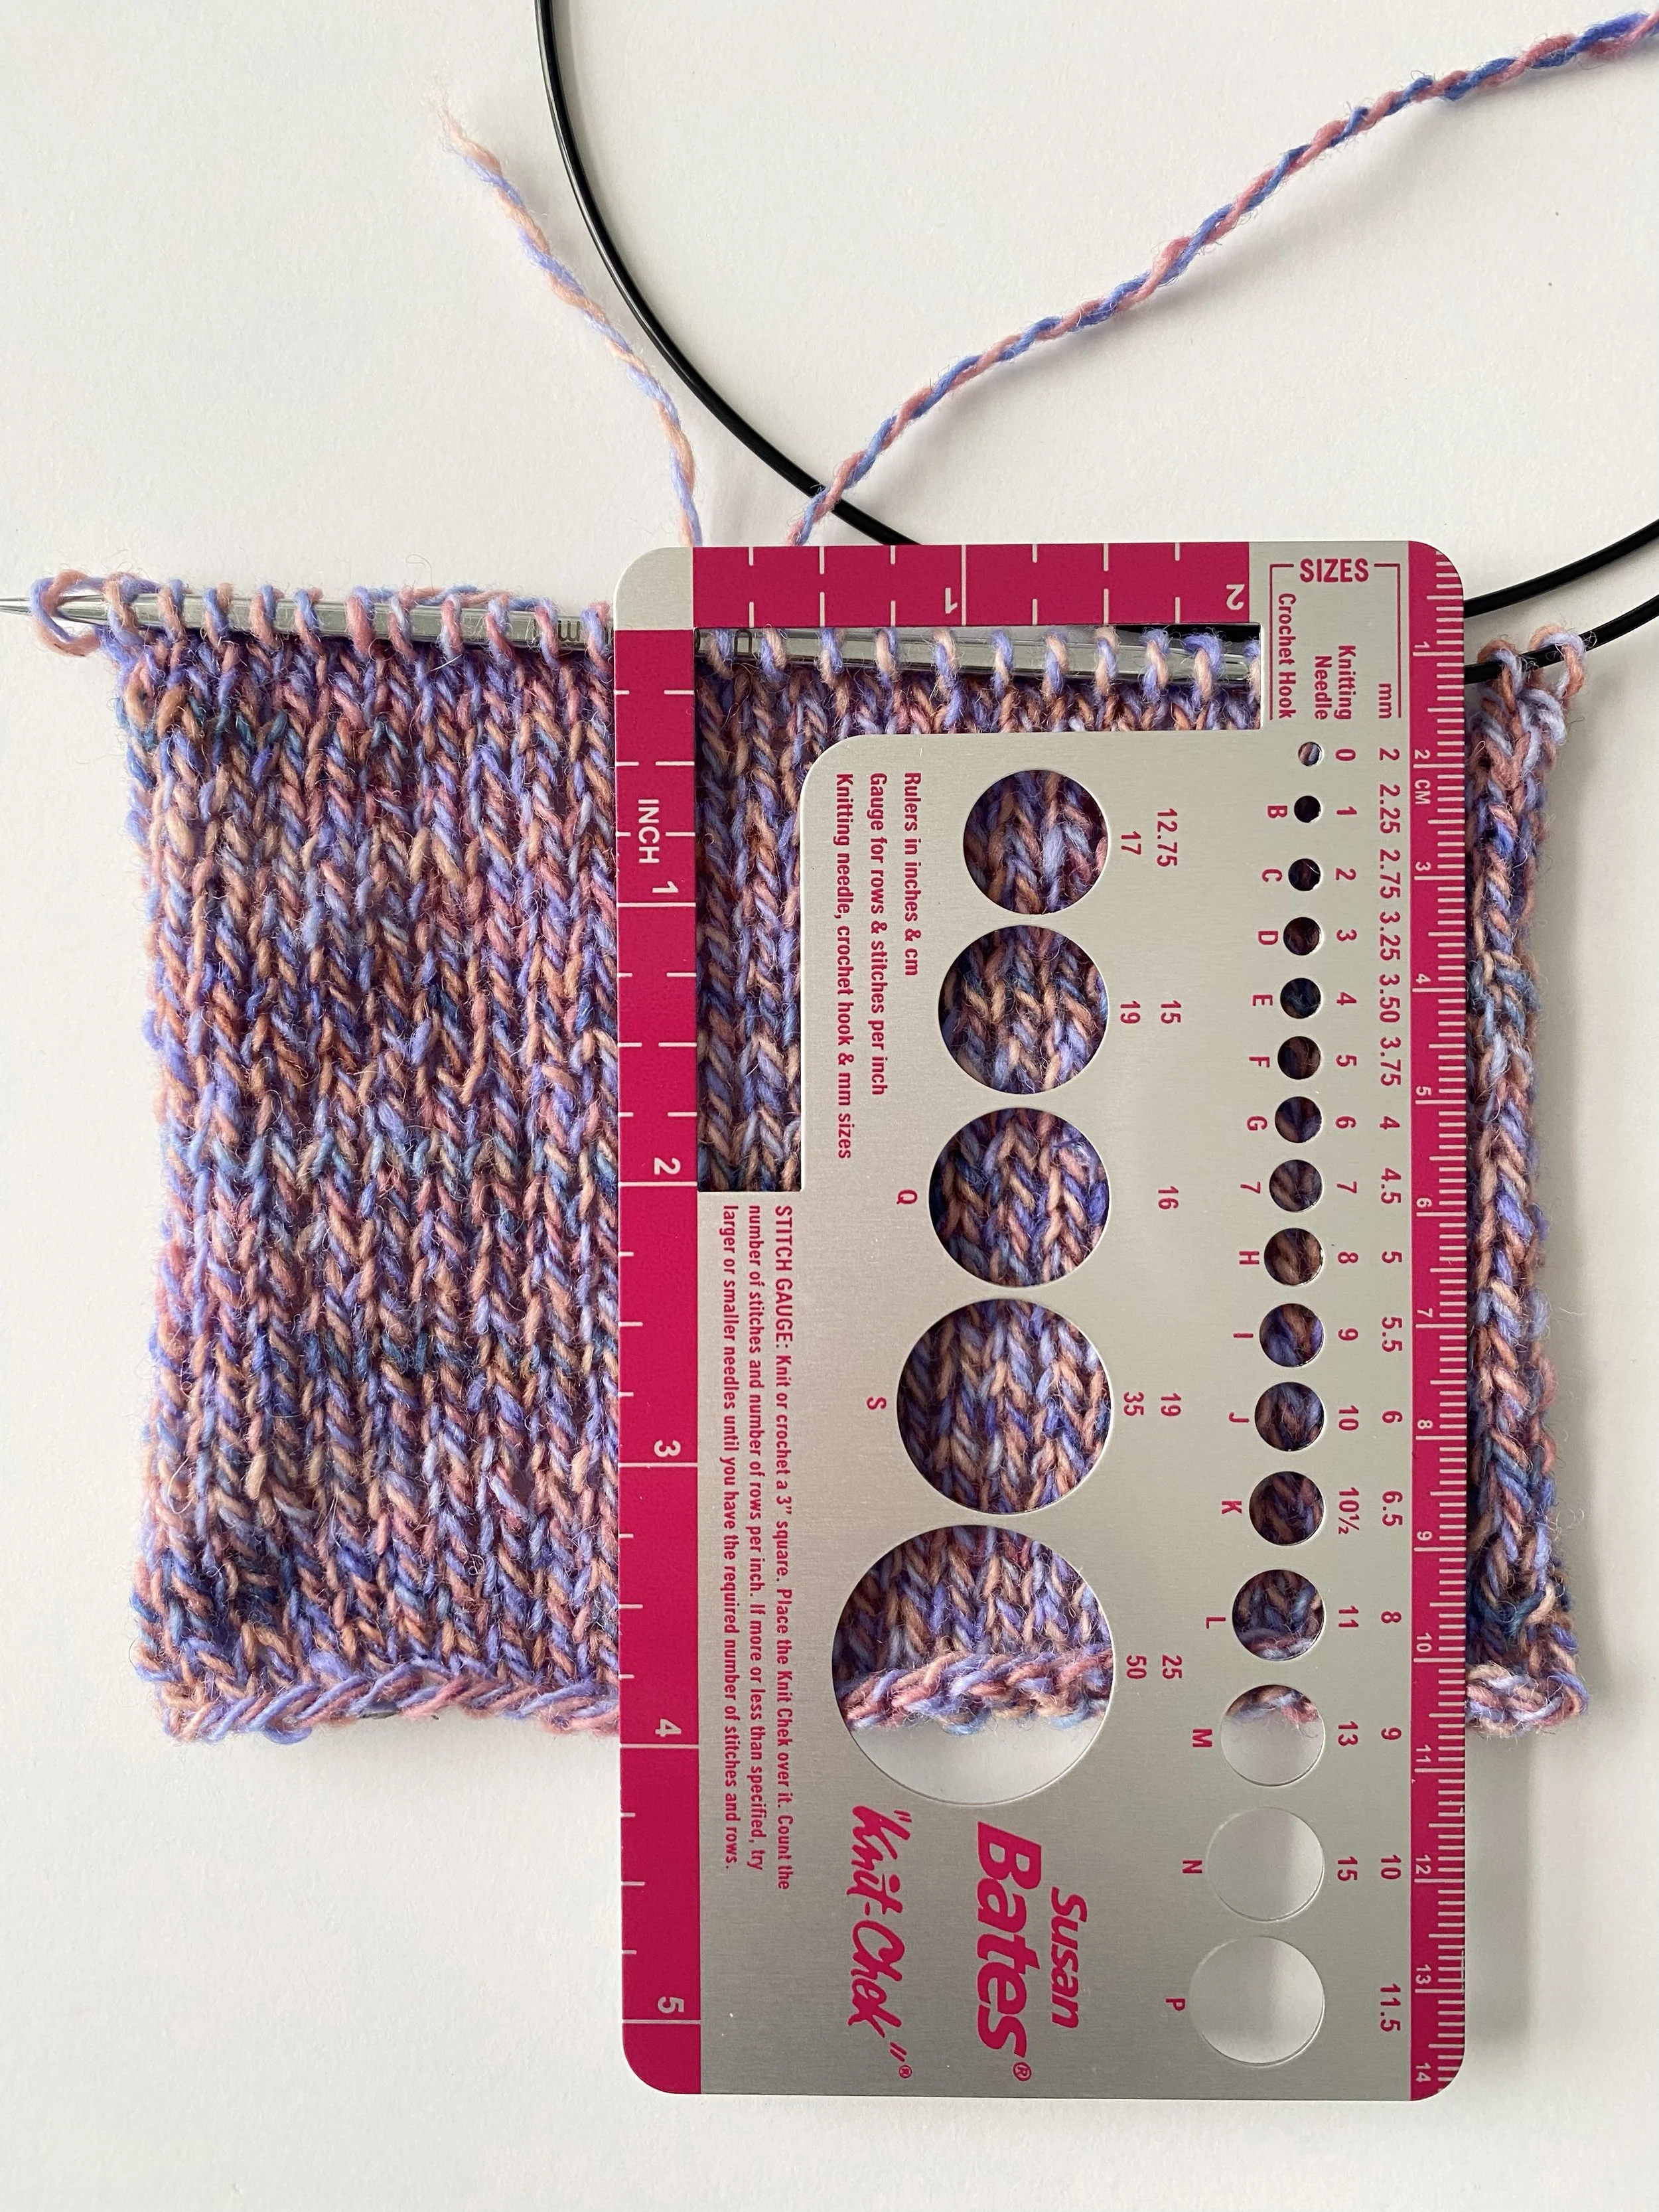
That’s what your Benchmark project is saying to you, and it will be well worth the small amount of time it takes to knit a swatch with your yarn before you cast on. There are key things you can learn from a swatch too. I’ll give you a few pointers here, along with some “extra credit” and insights:
Why all the fuss?
Getting your gauge correct means your sweater will turn out the size that you select! The cast on numbers of the pattern were determined based on the given gauge, so you need to match the size of your stitches to that of the pattern for your sweater to result in the same size.
Swatching shows you what your yarn will look like as knitted fabric, before you knit your sweater. That’s always exciting for me!
You can bind off the swatch and give it a soak to see how your yarn will block and finish. Plied Yarn blooms and softens when soaked. Knitting North Ave fingering at a 5-stitches-per-inch gauge for this sweater results in a fabric with some little gaps and looseness to it. When you soak your finished sweater, the fibers will expand and fill in those gaps. Magic!
You don’t have to waste yarn by swatching. Simply unravel your swatch and incorporate the yardage into your project.
Basic stockinette swatch—here’s how to do it!
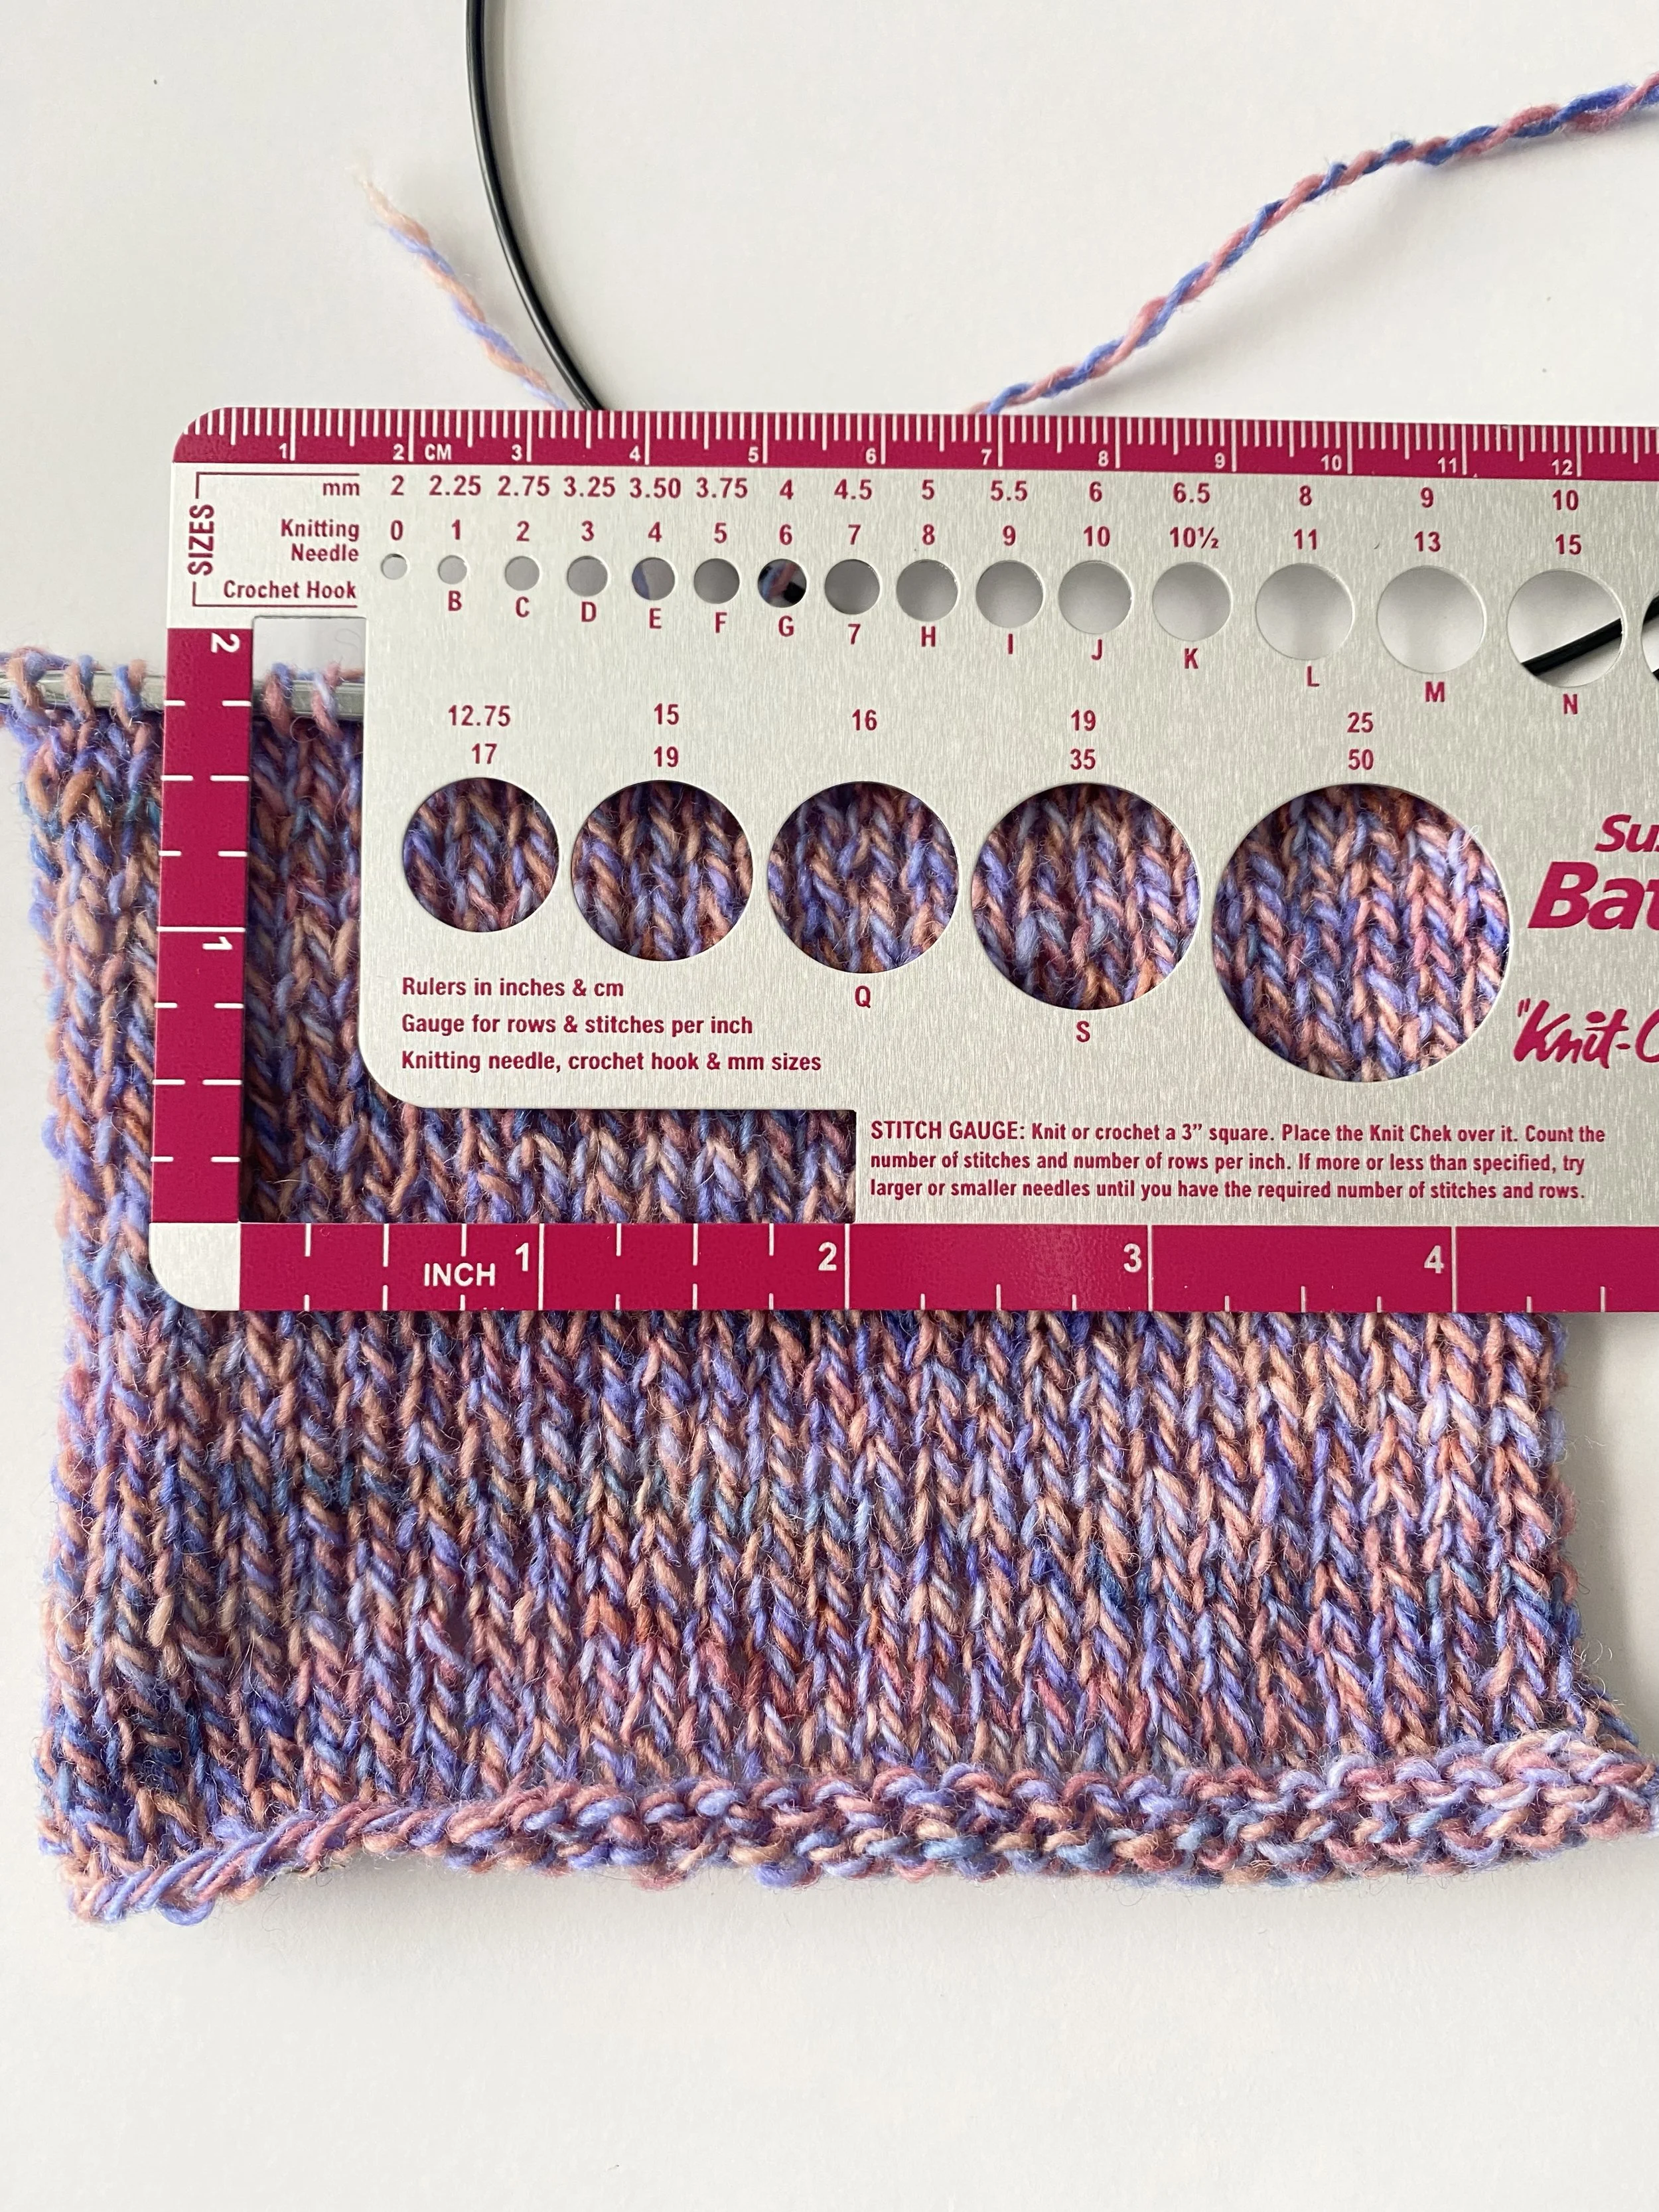
Check out the Benchmark pattern info. The gauge to achieve is 20 stitches within 4” in stockinette fabric. A needle size 6 is suggested. Simply cast on about 30 stitches (more than 20 is preferred so your swatch is wider and you can isolate 20 regular stitches to measure), using that size needle, and knit the RS rows and purl the WS rows to make stockinette fabric. Knit about 28 rows this way. Then get out a ruler or gauge tool and count the number of stitches you made within 4” across. Stay away from the edges where stitches can be wonky. Measure 4” in the center of the swatch.
Do you need to adjust? If you’re fitting more than 20 stitches into 4”, then your gauge is tight. Increase the needle size and knit another inch of fabric so that you can check it again. You don’t need to begin a new swatch! If you aren’t fitting 20 stitches into 4”, then your gauge is loose. Decrease the needle size, knit another inch, and check it again.
Determine the needle size that makes your 20 sts gauge with the yarn you are using. The needle suggested in the pattern is what the designer used with Plied Yarn North Ave to consistently get 20 sts gauge. Your knitting is unique to you, and it is specific to each project you make.
Got your needle size determined? Write it down on the pattern! This is the needle you will use for the body and sleeves of the sweater (whenever the pattern says to use the larger needle). Ribbings are made with a smaller needle. You can use the size suggested in the pattern for these edgings, or adjust up or down relative to the needle you are using for the body (2 or 3 sizes smaller).
Extra Credit
Count the stitches for row gauge. This is the number of stitches you count when you measure 4” vertically. For this project, aim for 28 stitches. Sometimes knitters vary from the suggested row gauge of the pattern, even while achieving stitch gauge. Both are important for Benchmark because the pattern is written by row and the length is determined by the number of rows to the underarm. For example, you repeat a 30-row stitch pattern that should fit into about 3.75”, if your row gauge is correct.
It’s not a big deal if your row gauge is a bit different, but if it’s a lot different, your sweater will turn out longer or shorter than the pattern says. It’s worth adjusting your needle size and playing with this gauge if you aren’t close. Tip: Sometimes changing the material of your needle, even when not changing needle size, results in tighter or looser stitches. Steel is slippery, and wood is less so. Knitting with wood needles often tightens up my stitches.
I hope you feel encouraged to swatch, especially if you’ve never done it before!
Reach out for help and share any comments, too—message me on Instagram or leave a comment on any @pliedyarnco post about the KAL.
Share your swatch
Please post or make a story with your swatch photo. Tag @pliedyarnco and include #benchmarkknitalong so that we see it and can share it!
Ready to cast on?
Terrific! Please read the Project Notes section of the pattern before beginning. Then you can bring your questions and comments to the Zoom Launch!
Cast on tips:
There are a lot of stitches to get on your needle. You might want to place a marker every 20 stitches or so, just for the cast on step (then remove them). This can help when you need to check your total count or if you lose your place while adding stitches.
If you’re making a Scrappy Benchmark, your MC is all the bobbins or all the scraps or various skeins you are using, rather than a single MC color. That means whenever the pattern says to use MC, you use a color from this collection. Cast on with one of these colors!
Post 1 — 1/16/24
Welcome!

Hello Everyone
Welcome to the first blog post for Plied Yarns! I’m Ruth Boelkins, indie knitwear designer (Spoutknits) and Plied social media manager. I’m also one of the biggest Plied Yarn fans you will ever meet! I live in Grand Rapids, MI, and I’ve been friends and co-workers with Ann and Beth for years. Together we’re hosting the first Plied Knitalong, and I’m thrilled that it features the Benchmark sweater pattern I published in ‘23, made with North Ave.
Ann, Beth, and I have made yarn kits for the Benchmark KAL, and I’ll walk you through the color choices in this post. But first, a little story about how Benchmark—and then Scrappy Benchmark—came to be.
Benchmark debuted as I met so many Plied fans at events in 2023. Perhaps you were there and purchased yarn for making a Benchmark! Because the samples in various sizes and color combinations were so well received, we’re excited to expand the Benchmark love with this Virtual KAL. If you’ve got your yarn and pattern, you’re all set to join in the fun. If you’d like some guidance with color selection before shopping kits or choosing your own colors, then continue reading!
Inspired by the colors and characteristics of Plied Yarn
Benchmark is a canvas for color play. Take a look at the samples I made for my family, each of which is a two color combo, but the amount of contrast varies. The pattern is written for making Benchmark this way, with a Main Color and a Contrast Color. MC is used for stockinette body, edgings, and sleeves. CC is used for broken seed stitch stripes.
Love this look and want to follow the color pattern exactly as written? Choose two colors on your own, or select one of the Two-Color KAL Kits. Yardage requirements are below.
You can also make this version with a special twist: select a Three-Color KAL Kit that includes brand new Plied colors and uses one of them for the sleeves!
Is a Scrappy Benchmark more your style?
After making all the sweaters for the photoshoot, I couldn’t keep myself from making a Benchmark with all the leftover colors I’d accumulated. So I gathered all the remnants and partial skeins in my stash and used them together as the total yardage of Main Color for a Benchmark. Extra full skeins became the MC sleeves. I used The Gateway for CC throughout, which showed up well in the broken seed stitch stripes.
If you’ve got lots of Plied remnants or various full skeins around, or you’ve shopped the Mystery or Mill End Bundle sales, you can use that yarn to make a Scrappy Benchmark.
Want to make it Scrappy but need all the yarn? Check out the Scrappy Benchmark Kits for this KAL! We’ve made two kits, one bright and one cool. Each kit has coordinating full skeins for MC sleeves, along with a CC color. Join the KAL, and I’ll guide you through the process of making your Scrappy Benchmark using one of these kits or your accumulation of Plied in many colors!

One more color option
Benchmark is a gansey pullover at heart. It’s a dropped sleeve style with an allover textured pattern of knit and purl stitches. And it looks fantastic in a single color! I’ve made one in cream and a friend made one in charcoal, and they’re both lovely. Select one color of Plied North Ave in the total yardage amount for your size (add MC and CC yardages together). Then work the pattern as written, ignoring any color changes. Simple, and classic.
Prizes!
At the end of the KAL, we'll randomly choose three knitters who finished their Benchmarks to win prizes!
First prize: Full set of Plied Bobbins (36 bobbins, approximately 1260 yards)
Second prize: 18-bobbin set in either Neutrals or Brights (approximately 630 yards)
Third prize: Two skeins of your choice in either North Ave or Penn Ave
To be eligible for a prize, you must finish your Benchmark by March 10, 2024, and either send us or tag us in a photo of your finished project. Your project must include some Plied yarn—any amount from a few bobbins to a full sweater!

Have questions?
I’d love to help! Follow @pliedyarnco and message me on Instagram. There will also be Instagram posts all throughout the KAL. Follow #benchmarkknitalong so that you catch every video and tip. Please share your yarn photos, project cast ons, and progress on Instagram too, and don’t forget to tag @pliedyarnco in your posts and stories. Then we get notified and won’t miss seeing them!
Here’s my first tip: pick up the Benchmark pattern on Ravelry, and read the special notes I’ve included about selecting your size and wearing this style with your favorite amount of ease. Then you’re ready to shop your Plied colors or KAL Kit.
Get signed up for the Benchmark KAL today! Watch your inbox for more knitalong news and blog posts, including how to prepare, knit a swatch (yes!), and all the good stuff that goes into sweater making. Thanks for reading, and I can’t wait to get started with you!